Photographing Your Home with a Digital Camera
by Jackie Davis 11/18/2017
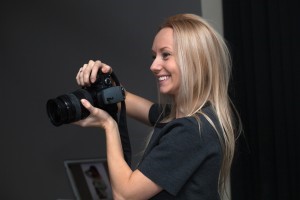
If you're selling a home, having high quality photos is one of the most important things you can do to catch the eye of prospective buyers. Taking great photos, however, is something that requires a combination of frequent practice and knowledge of how your camera works. Sure, these days you can take a decent photo with an iPhone camera and be done with it. While that method is a good start, if you want to progress with your photography you'll eventually have to make the leap to a DSLR where you have more freedom to change exposure settings.
I know what you're thinking. High quality photos means spending a ton of money on camera equipment, right? Fortunately, entry level DSLR cameras have become more affordable in recent years. To start taking great photos you'll only need four things: your DSLR camera, a tripod, a wide angle lens, and a place to practice your photography.
Step 1: Setting up
You'll want to set up the room with the right balance of furniture, decorations and natural light. Avoid decorations that are too personal (like family photos) or eccentric (no stuffed animals, preferably).
Set up your tripod against one of the walls of the room. Ideally, you'll have the target of your photo illuminated by natural light coming through windows, so you'll likely be standing in front of or next to the windows. However, before you take any photos use your best judgment to determine the room's best angles. The amount of and the placement of furniture will play a large role in how spacious the room looks, but equally important is the camera angle from which you take your photos.
Step 2: Learn your camera settings
You won't learn all of the settings in a DSLR overnight, but it is important to get an understanding of the basics. In spite of the many technical improvements that have been made, the basic concept of a camera hasn't changed much over the years. The two main components that determine what your picture looks like are aperture and shutter speed.
Aperture (or "f-stop") is what is used to determine how much light enters the camera. Much like your pupils dilate in the dark to let in as much light as possible, having a wide aperture will allow you to take brighter photos.
Shutter speed is the amount of time the shutter on your camera is open. A slower shutter speed allows more light into the camera, creating a brighter exposure. However, due to our inability to hold a camera entirely still having a slower shutter speed creates more opportunity for your photo to become blurred from camera shake.
A third important setting is the ISO. This setting is unique to digital photography because it controls the sensitivity of the camera's image sensor. The higher the number, the more sensitive. Why not just crank it up all the way then to get the best quality? Because if you set it too high the photos become grainy or "noisy."
Step 3: Practice
Now that you know the basics, start taking photos in your home using various camera settings. Play around with taking photos with different light sources on, with your camera flash on and off, and at different times of day. You'll find that there are endless possibilities when it comes to taking photos of your home.
 If you're selling a home, having high quality photos is one of the most important things you can do to catch the eye of prospective buyers. Taking great photos, however, is something that requires a combination of frequent practice and knowledge of how your camera works. Sure, these days you can take a decent photo with an iPhone camera and be done with it. While that method is a good start, if you want to progress with your photography you'll eventually have to make the leap to a DSLR where you have more freedom to change exposure settings.
I know what you're thinking. High quality photos means spending a ton of money on camera equipment, right? Fortunately, entry level DSLR cameras have become more affordable in recent years. To start taking great photos you'll only need four things: your DSLR camera, a tripod, a wide angle lens, and a place to practice your photography.
If you're selling a home, having high quality photos is one of the most important things you can do to catch the eye of prospective buyers. Taking great photos, however, is something that requires a combination of frequent practice and knowledge of how your camera works. Sure, these days you can take a decent photo with an iPhone camera and be done with it. While that method is a good start, if you want to progress with your photography you'll eventually have to make the leap to a DSLR where you have more freedom to change exposure settings.
I know what you're thinking. High quality photos means spending a ton of money on camera equipment, right? Fortunately, entry level DSLR cameras have become more affordable in recent years. To start taking great photos you'll only need four things: your DSLR camera, a tripod, a wide angle lens, and a place to practice your photography.